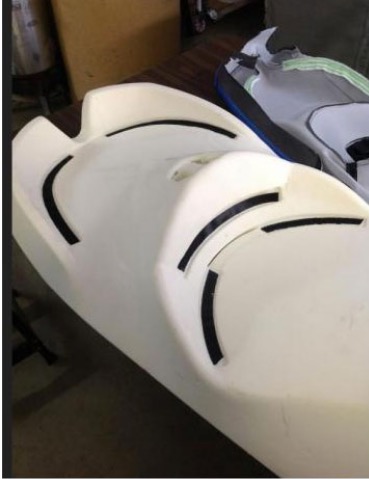
Step 1
Remove seat from bike. Be careful of the wires that go to the sensor within the seat. Before removing the seat hardware, it’s a good idea to stuff a rag down the hole behind the rear attachment point so as not to lose the hardware down inside of the bike.
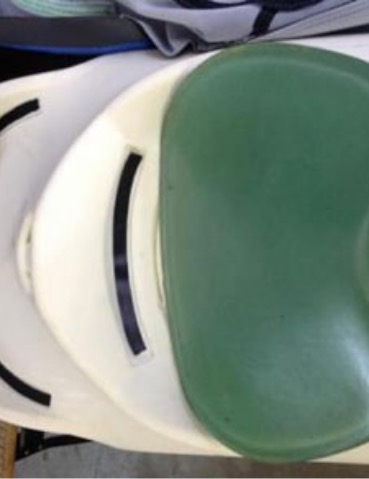
Step 2
Remove seat cover from seat. You can use an awl to pry up the staples. Be careful of the Velcro attachment points (as shown in picture above). Some of the newer seats on RT models use hog rings and not Velcro.
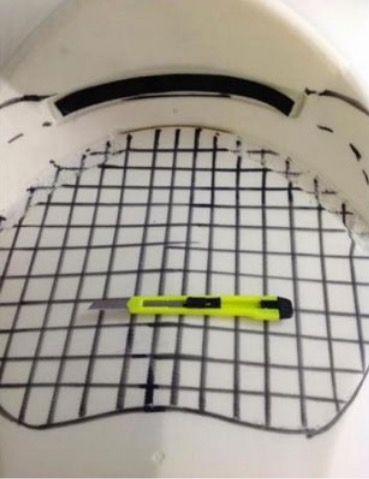
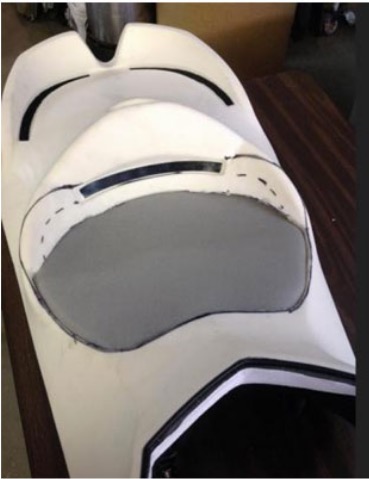
Step 3
Place the gel/memory foam pad on the seat where you would want it to go. (You can temporarily lay the seat back on the bike and sit on it to “fine tune” the positioning of the pad.) Then trace around it using a marking pen. (When finished the foam side will face up, but you can turn it upside down with the gel side up, as shown above, to make it easier to trace the outline.)
Step 4
Now draw a grid across the outline as shown above. Next take the razor blade knife and set the blade to the exact depth of the gel/foam pad, and lock the blade in place. Then cut around the inside of the outline, and then across each of the grid lines. (When cutting around the outline, be careful to cut on the “inside” of the line.)
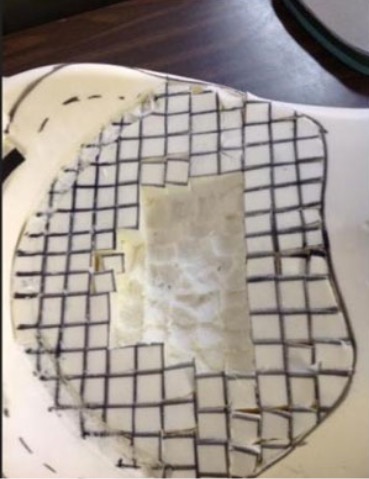
Step 5
Now you can “pluck” out the little squares of seat foam to make room for the gel pad. Go slowly and make the bottom surface as smooth as you reasonably can. Use the knife for shaving larger pieces of the bottom surface if necessary. (Small uneven areas will not matter, in the end) but get the cut out area as smooth as you can, an air die grinder with a sanding disc works great.
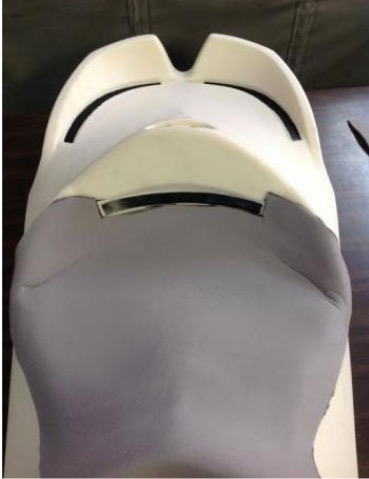
Step 6
Next take the thin foam material supplied, and place it on top of the gel pad, shaping it around the top of the seat foam as shown above, spray a small amount of spray glue down the center then lay the thin foam over the seat, stretch it around the seat and spray a little glue to hold it in place, then do the other side the same way until it looks like the picture above .
NOTE: if you are installing 2 GEL pads one in the rear as well stretch the thin foam over the entire seat.
If you are installing one of Dave’s SEAT HEATERS, place it on top of the GEL/memory foam and then put the thin foam covering on .
8. Now it’s time to replace the seat cover. Re-attach any Velcro strips with glue, if necessary. Then re-staple the cover with a staple gun. Some times it is helpful to have a hair drier handy to warm up the upholstery cover to help stretch it over the seat.
9. Install the seat and plug in any electrical cords.